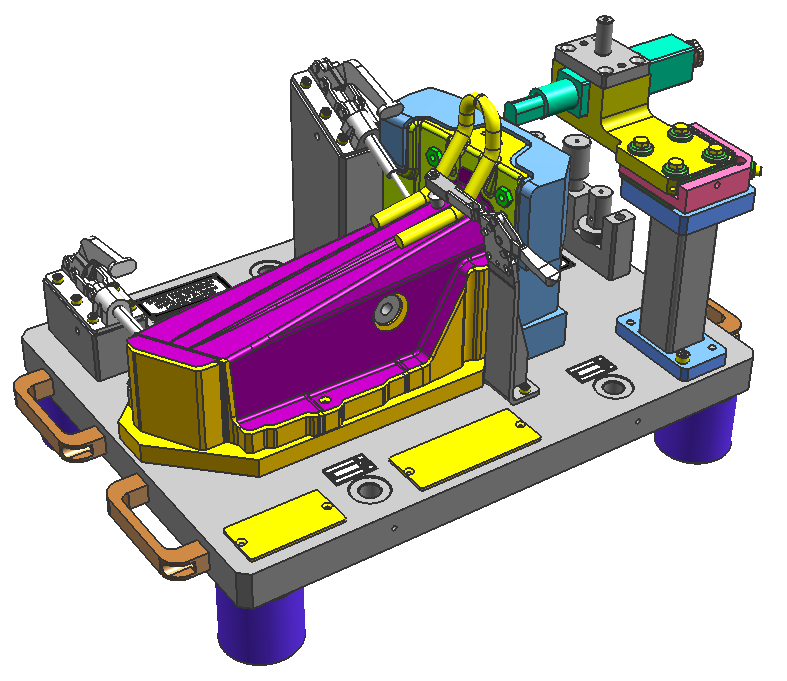
A control fixture is a precision-engineered tool designed to facilitate accurate measurement of complex parts during the manufacturing process. Rather than relying on intricate manual measurement techniques, control fixtures provide a simpler and faster method to verify surface profiles, cut lines, bending angles, and hole alignments. They are essential in ensuring that components meet strict dimensional and geometric tolerances, particularly in industries such as automotive, aerospace, and electronics manufacturing.
Key Functions and Importance of Control Fixtures
- Dimensional Verification: Control fixtures are designed to measure critical features of parts such as holes, cut edges, and surface profiles with high precision.
- Rapid Measurement: They enable quick and repeatable inspections, significantly reducing the time required for quality control processes.
- Positioning Accuracy: Proper alignment of the part on the fixture is crucial. The use of clamps, locators, and reference pins ensures that the part is consistently positioned for accurate measurement.
- Quality Assurance: By providing reliable and repeatable measurement results, control fixtures play a vital role in maintaining product quality and consistency across large production volumes.
Types of Control Fixtures
- Manual Fixtures: These require manual operation to position the part and record measurements. They are simple and cost-effective but rely on operator skill for accuracy.
- Semi-Automatic Fixtures: Incorporate some level of automation to assist in positioning or measuring, improving accuracy while maintaining flexibility.
- Fully Automated Fixtures: Integrated with automated systems and sensors, these fixtures perform measurements without human intervention, providing high precision and speed.
Critical Components of a Control Fixture
- Clamping Mechanisms: Ensure the part remains securely in place during measurement. These may include mechanical clamps or pneumatic systems.
- Locating Pins: Precisely position the part on the fixture, ensuring consistent alignment with measurement instruments.
- Measurement Probes: Often integrated with coordinate measuring machines (CMMs), these probes record the dimensions and geometries of the part.
- Reference Surfaces: Serve as the baseline for measurements, ensuring all dimensions are relative to a consistent point or plane.
Challenges in Using Control Fixtures
- Complex Geometries: Measuring parts with intricate or curved surfaces can be challenging, requiring custom-designed fixtures to ensure accuracy.
- Initial Setup Time: Designing and calibrating control fixtures can be time-consuming, especially for complex parts. However, this investment is offset by faster inspection times during production.
- Maintenance and Calibration: Fixtures must be regularly maintained and recalibrated to ensure ongoing accuracy, especially in high-volume production environments.
Advances in Control Fixture Technology
- 3D Printing in Fixture Production: Additive manufacturing is increasingly used to produce lightweight, custom fixtures with complex geometries, reducing lead times and costs.
- Integration with Digital Inspection Systems: Modern control fixtures are often integrated with digital measurement systems, enabling real-time data collection and analysis.
- Smart Fixtures: Incorporating IoT sensors and data analytics, smart fixtures provide enhanced monitoring and predictive maintenance capabilities.
Conclusion
Control fixtures are indispensable in modern manufacturing, offering precision, efficiency, and repeatability in quality control processes. Their role in ensuring dimensional accuracy and maintaining product consistency is vital, particularly in industries where even minor deviations can have significant consequences. As technology advances, control fixtures will continue to evolve, integrating more automation and smart capabilities to meet the demands of Industry 4.0.
